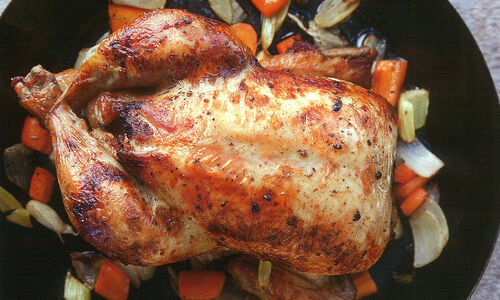
There are countless recipes for “perfect” roast chicken, from simple two-step methods to elaborate three-day preparations, and while we’re not going to tell you which ones we deem “perfect,” we are going to dole out some advice on how to achieve that delicious, crispy skin regardless of which recipe you choose.
Choosing the Right Chicken
Starting with a high-quality, air-chilled chicken is the first step in achieving tasty results. In conventional poultry processing, chickens are chilled by soaking in icy cold water, which allows for the absorption of moisture – sometimes up to 12% of the birds weight. The extra water dilutes the chicken’s natural juices, creating bland meat and soggy skin, which is much harder to crisp in the oven.
Air-chilling poultry is a method of cooling birds with air rather than water. In the air-chilling process, chicken carcasses move through several “wind chambers” in which cold, purified air is run over them to quickly bring the temperature down. Without the dilution from added water, the meat retains its natural juices leaving you with tender, juicy meat and true chicken flavor. The skin on an air-chilled chicken is much easier to crisp and will give you evenly browned, crunchy and flavorful skin every time.
Prep the Chicken
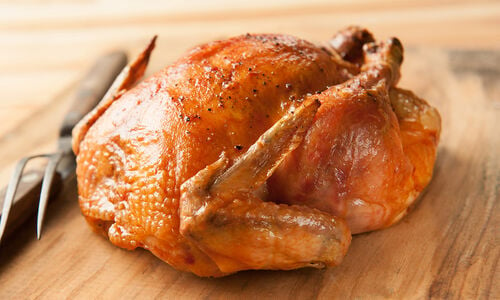
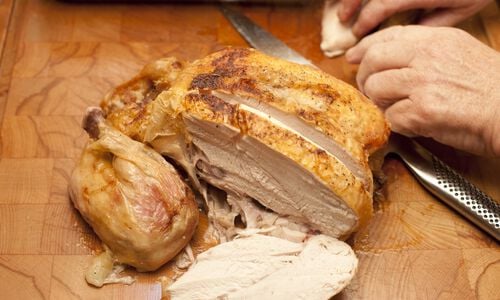
To achieve maximum crispness, the skin has to start dry and stay dry – if water is present, it will create steam, which inhibits crisping. For the ultimate crispy skin, start your prep the day before. After quickly rinsing your bird, be sure to thoroughly dry it inside and out with paper toweling. Don’t forget to dry the crevices inside the carcass, in the “pit” of the wings and the area underneath the neck flap. Remove the lump of fat that sits just inside the cavity.
Separating the skin from the meat will also aid in crisping. Gingerly run your fingers between the skin and breast meat, being careful not to tear it. Some will slip butter under the skin but butter contains water (no steam!), so we use tasty duck fat instead. Gently rub about 2 tablespoons of softened duck fat under the skin, over the breast. Season the outside with a generous sprinkling of kosher salt then set the bird on small rack set over a lipped sheet pan and store uncovered in the refrigerator overnight. The kosher salt will bring excess moisture to the surface, which will dry in refrigeration. Be sure to leave plenty of space all around the bird for air circulation.
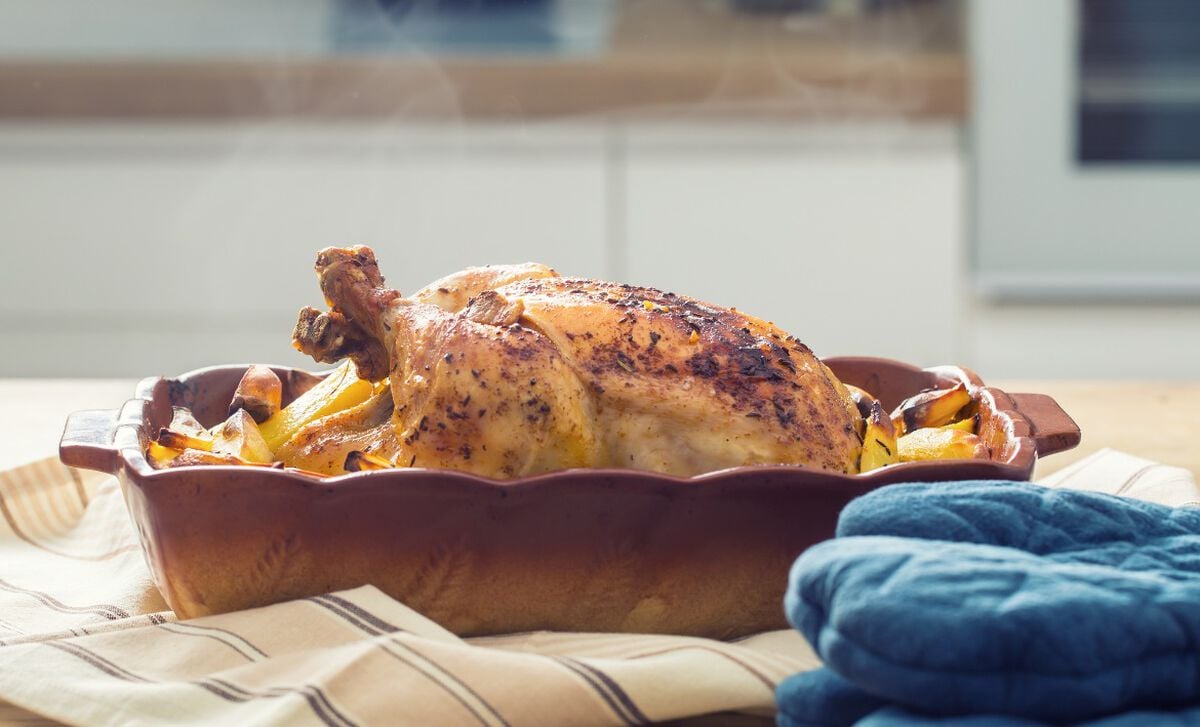
In the Oven
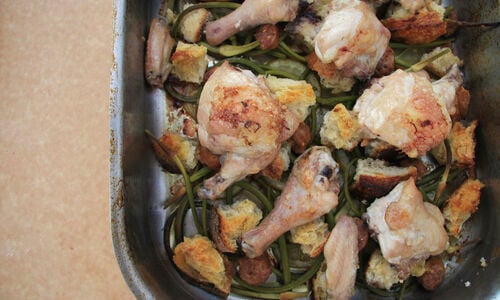
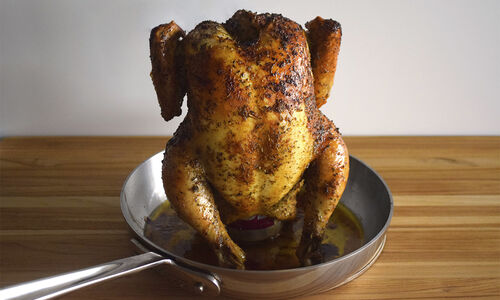
Remove the chicken from the refrigerator about ½ hour before you’re ready to roast. Recipes may recommend roasting on a rack, a vertical roaster, or directly in a shallow pan. Whichever you use, make certain there is adequate airflow all around the bird. For example, the sides of a Dutch oven are too high, blocking airflow and trapping steam, so choose a shallow, metal-handled skillet or roasting pan instead. If using a vertical roaster, put the bird on upside down so the juicy dark meat will “baste” the white meat keeping the breasts moist. If using a rack, start roasting breast side down for the first 30 minutes, for the same effect.
The crispiest skin comes from a convection oven, then an electric oven, and lastly a gas oven. For gas ovens, we recommend roasting at a high temperature. Anywhere between 400 degrees F and 450 degrees F will lend the best results. Just be certain to use your exhaust fan.
Crispy skin is the goal but don’t overcook the meat in the process! Always check the internal temperature with an instant-read thermometer and pull the chicken out of the oven about 10 degrees before it hits the recommend early. Residual cooking will continue as the bird rests.
Related Products

Price
$41.99
- Humanely-raised
- USDA-certified free-range organic chicken
- 100% non-GMO, organic feed of corn and soy
- No antibiotics or hormones
- No animal by-products
- No arsenicals
- Raised to 8 weeks
- Air-chilled for no retained water
- Farm-to-table audit trail
- Sold in an uncooked state
- Product of USA
- For best taste on fresh products, use or freeze within 3-5 days of receipt; for frozen products, use within 1-2 days after thawing
- Subscription Eligible


Starting at
$38.99
- Regeneratively raised on managed pasture*
- Certified Humane® by Humane Farm Animal Care
- Recognized by ASPCA and included in their “Shop With Your Heart” list for meaningful animal welfare standards
- Cornish Cross breed chicken
- Raised free-range
- Fed a diet of surplus vegetables sourced from local farms
- Wholesome grain feed, including corn and soy
- No antibiotics or hormones
- No animal by-products
- Air-chilled for no retained water & maximum flavor
- Farm-to-table audit trail
- Sold in an uncooked state
- 2 individually wrapped chickens
- Product of USA
- For best taste on fresh products, use or freeze within 3-5 days of receipt; for frozen products, use within 1-2 days after thawing
- Subscription Eligible
*Farming system where chickens are fed regeneratively grown grain grown on managed pasture. Waste and processing waste are composted and returned to the soil to improve soil health.


Starting at
$25.99
- Certified Humane® by Humane Farm Animal Care
- Recognized by ASPCA and included in their “Shop With Your Heart” list for meaningful animal welfare standards
- Heritage Gallus brun breed chicken
- Raised free-range
- Surplus vegetable and wholesome grain feed, including corn and soy
- No antibiotics or hormones
- No animal by-products
- Raised to 85 days – twice the time of average chicken
- Air-chilled for no retained water & maximum flavor
- Farm-to-table audit trail
- Sold in an uncooked state
- You may find a few dark pinfeathers
- Product of USA
- For best taste on fresh products, use or freeze within 3-5 days of receipt; for frozen products, use within 1-2 days after thawing
- Subscription Eligible
*Farming system where chickens are fed regeneratively grown grain grown on managed pasture. Waste and processing waste are composted and returned to the soil to improve soil health.


Starting at
$25.99
- All-natural ingredients
- Small-batch production
- Grade AA creamery butter
- Real truffles
- Ideal for meat, sauces, pastas
- Freezes beautifully
- Allergens: Contains milk, soy, wheat, mushrooms, seeds
- For best taste, use or freeze within 14 days of receipt and/or by the expiration date on the package
- Subscription Eligible


Starting at
$19.99
- All natural
- No added preservatives or artificial ingredients
- Low in saturated fat
- Gluten-free
- Ships frozen (best kept frozen)
- For best taste, use within 6 months of receipt and/or by the expiration date on the package
- Subscription Eligible