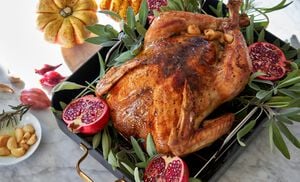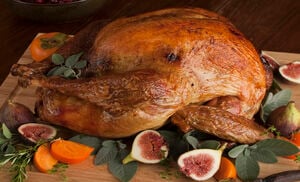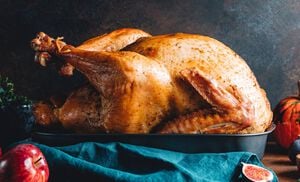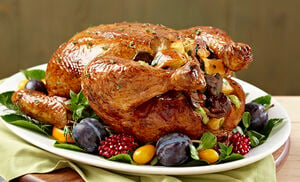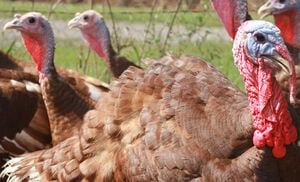
Every November, the topic generating the most buzz is how to roast your Thanksgiving turkey without drying it out. Turkey is a lean thin-skinned bird, without the benefit of a generous layer of fat beneath the skin to protect it from the dry oven heat.
Further, when roasted breast up, a turkey’s leanest meat takes the most direct hit from the oven heat for the full duration of cooking. This is why you rarely hear anyone complain about dry dark meat. So, if you simply compensate for the turkey’s thin skin and lack of protective fat, you will be well on your way to roasting a perfectly moist and juicy bird.
Several cooking techniques address this issue, and there are variations on each technique. All begin by first protecting the bird, most especially the breast, with a layer of good quality fat, and then employ basting during cooking.
Fat of the Land
The simplest technique is to borrow fat from a duck, which has plenty to spare. Our wonderful pure, rendered duck fat is just the ticket for this occasion. Just pat the turkey dry with a paper towel, and rub it all over with a generous coating of softened duck fat, before seasoning with salt and freshly ground pepper. This fat will help the salt and pepper stay put, and more importantly, it will help the skin to brown. Not only is browned skin beautiful and tasty, it seals in natural juices during cooking. Roasting with duck fat will create crispy brown and delicately delicious skin.
In addition to protecting with fat, you can sear the skin to help lock in juices by starting the bird in a 450° or 500-degree F oven for the first 30 minutes, then reducing the oven temperature to 325° or 350° degrees F for the duration of roasting time. Conventional slow roasting is done at 325° or 350° degrees F for the entire duration.
After the bird is in the oven for about 20 minutes, baste regularly with additional melted duck fat, until there are enough pan drippings to baste the whole turkey. Proper and frequent basting will keep the meat from drying out. Baste a big bird at least every 20 minutes, and smaller ones about every 15 minutes because the cooking time is shorter. Remember to baste the entire exposed bird, not just the breast.
It’s Like Butter
Buttering beneath the skin is the second technique, and this one actually helps the bird to self-baste. For birds up to 16 pounds start with a well-chilled 1-pound roll of our black truffle butter. You may want two rolls if your bird is any bigger. Slice each roll evenly creating approximately 1/4-inch thick discs.
Use your fingers to slip between the skin and meat at the neck opening, gently working up to using your entire hand to ease your way carefully along the breast and leg meat, taking care not to puncture the skin. Then place the black truffle butter discs in an even layer over the entire surface created between the skin and the bird; pat the skin back into place, and season generously with salt and freshly ground pepper.
Start this bird in a preheated 500° degrees F oven, cook for 30 minutes to sear in juices, then reduce the oven temperature to 325° or 350° degrees F for the remainder of the cooking time. The truffle butter will melt into the meat making it moist and flavorful, as well as brown and crisp up the skin, leaving the delicious bits of black truffle just beneath the surface. It’s not necessary to baste this bird, but of course, you may if you prefer.
Butter-Soaked Cheesecloth
Cloaking with butter-soaked cotton cheesecloth is a technique especially good for a heritage turkey. Fold and trim a sheet of cheesecloth to create four layers large enough to drape and cling to the contours of the entire breast. It’s okay to partially cover the drumsticks as well. Stack the four layers together and saturate in a basting mix of melted, unsalted butter and stock or dry white wine, or a basting mix of your choice, and then drape the cloth over the bird. Brush the entire bird, including over the cloth, with the basting mix.
Start this bird in a preheated 450° degrees F oven, cook for 1 hour, basting regularly, and then reduce the oven temperature to 350° degrees F for the remainder of the cooking time. As soon as you have enough accumulated juice in the pan for basting the whole bird, use it instead of the basting mix. In the last hour of cooking, take the bird out of the oven and remove the cheesecloth, and then return the bird to the oven so that it can brown while it finishes cooking. You should continue to baste about every 20 minutes.
Barding with Bacon
Barding, or covering the bird completely with a thick layer of bacon or salt pork is also a fine, time-honored method to protect the meat from the dry heat. Barding replaces rubbing the bird with fat and adds to the pan drippings. Follow the steps for conventional roasting and basting.
Don’t Overdo It
Use each basting as an opportunity to keep an eye on the browning; if the skin becomes too brown too soon, you had better protect the skin. You can shield it from the blast of heat with a piece of aluminum foil, shiny side up, that you crease from side to side across the center to form a tent shape. Place this tent very loosely over the top of the turkey. Be sure to leave at least 2 to 3 inches open between the bottom of the foil and the top of the roasting pan, to avoid trapping moisture or steam under the tent (remember, dry heat). If at this point the bird is already as brown as you would like, use the foil shield through the remainder of the cooking, and continue to baste as usual.
Otherwise, take the foil off at the beginning of the last hour of your cooking range to allow the bird to continue browning and the skin to ‘crisp’ again. If after that, the skin has browned to your liking, and the bird has still not finished cooking; just put a tent back over the turkey and leave it until the bird does finish cooking. In either case, it is very important to continue basting as usual.
BASTING TIPS
- Put your bird into the oven ‘legs first’, because ovens are often hotter in the back, and the temperature is more apt to fluctuate in the front due to opening the door for frequent basting. This will help the thighs cook faster, and give you easier access to baste the breast, which is the leanest part of the bird.
- You can stop basting the bird in the last 30 minutes or so if you want crispier skin.
- Never cook a bird at temperatures below 325° degrees F.
Are We There Yet?
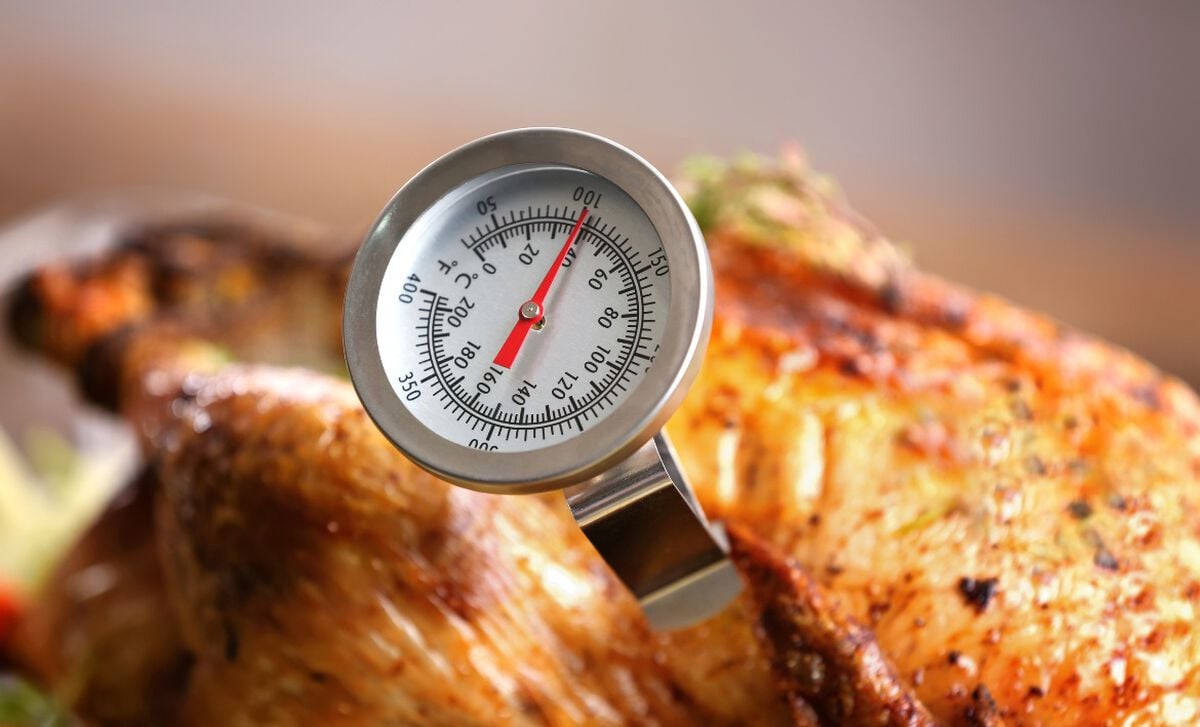
Even when equipped with a guideline and good intuitive timing, a quick-read or instant-read meat thermometer is an indispensable tool for determining when your bird has finished roasting. These are not the same meat thermometers that protrude out of the breast throughout roasting. Quick-read thermometers have a slender sensor that you push into the meat to take the temperature reading and then remove. Once found only in professional kitchens, these great little tools are widely available for home use, and handy for testing the temperatures of other types of meat as well.
Schools of Thought
Some recipes will tell you to test the internal temperature at the thigh and others at the breast, and there is a broad range of suggested internal temperatures to choose from, as well as the USDA’s recommendation that the overall internal temperature of the bird be at 165° degrees F. There are lots of variables from oven to oven as well as bird to bird, so what works well with one bird may not be as perfect with the next. To help you choose a method, first know that to test the temperature of your bird, push the point of the thermometer deep into the thickest, meatiest part of the breast or the thigh, down to the bone, without coming to rest on the bone. It is also a good idea to check both sides of the bird. In a matter of a few seconds, the needle will rise, at first quickly and then slowing, and then stopping at the internal temperature.
Next when deciding, keep in mind that the ideal final internal temperature is 165° degrees F and that the bird continues to cook and the internal temperature rises about another 5 to 10 degrees as the bird rests. Also, remember that the breast will cook faster than the thigh. Whichever method you use, taking the bird out when you get a reading of 160° degrees F is a passive way to safely reach 165° degrees F at the testing site of your choice.
QUICK TIPS
- If you see that your bird is browning unevenly, it may be due in part to uneven heat zones in your oven. Don’t be afraid to spin the bird around in the oven once or twice during the roasting process to give all parts of the bird exposure to the varying heat. This should help even it out. Be sure to test internal temperature on both sides of the bird for doneness.
- When roasting an unstuffed bird, and using an x-shaped rack, many cooks will start with the breast down, for the first one-third of the cooking time. This increases the rate at which the thighs cook, which will help achieve a more consistent temperature throughout the bird.
- If you find that the meat around the thigh joint is still too pink, you can remove the turkey legs; just cut the drumsticks from the thighs, and put the thighs in a shallow pan in a 450° degrees F oven until no longer pink for 10 to 15 minutes. Having to do this is still better than drying out the entire bird.
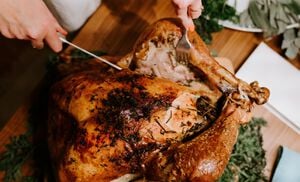
Give the Bird a Breather
Finally, it is time for a good rest. Unfortunately, that rest is for the bird, not for you. After the turkey is through cooking, remove it from the oven, and transfer it to the waiting board, pan or warmed platter. Then place it in a warm place (out of the way of any drafts) to allow it to ‘rest’ with the dressing still inside. Do not just place it on a flat cutting board; if you do, then place the board on a towel with a margin of towel exposed completely around the edges to absorb any juices that will start to release as the bird rests. Transferring the bird will also free up the roasting pan for making gravy or a deglazing sauce.
Without elaborating on the kitchen science of ‘resting’, know that this allows the juices to settle back into the meat, and the meat to firm up enough for proper carving.
Remove the tent if you were using one during cooking, and do not otherwise cover the bird so that the rising heat and moisture do not steam or soften the crispy skin. Depending on the size of the bird, give it at least 20 minutes or so. It is better to let the turkey get a little cooler than to rush it and have the juices run from the meat.
Don’t Rinse that Pan!
The next order of oven roasting business is to attend to all of the fat, browned tasty bits and congealed cooking juices that have accumulated in the roasting pan. You will use this as a fond or base for flavoring your gravy. There are at least two different methods to do this.
With the first method, you drain most of the fat from the roasting pan and use the remaining pan drippings to make the gravy right in the roasting pan. This results in a rich and delicious, more home-style gravy with little, tasty bits from the pan. The second method calls for deglazing the roasting pan with a liquid that will contribute to the taste of the fond such as a dry French vermouth, a dry white wine or some of your stock. You then simmer this deglazing mixture in a saucepan for several minutes. The resulting intensely flavored sauce is your fond. Both methods rely on turkey stock, which is another type of fond, as the hearty foundation and primary liquid for the gravy.
Basic Deglazing Sauce
To deglaze your roasting pan you will need to have your deglazing liquid prepared and ready. You can use a cup or so of one of the liquids just mentioned, or whatever liquid and amount called for in your gravy recipe. To begin, skim the excess fat from the pan and reserve. Now heat the roasting pan on the stovetop over medium heat, and use a long-handled wooden spoon to scrape the bottom of the pan as it is heating to prevent scorching or burning. Most roasting pans are large enough that this requires using two burners at one time.
Once the pan is heated, carefully pour the liquid into the pan, and simmer for a minute or two as you continue scraping the bottom of the pan to gather all the bits, and congealed juices into the deglazing liquid. When most or all of the bits have released from the bottom of the pan and the congealed juices have liquefied, pour this mixture into a heavy saucepan.
Simmer this flavorful brown mixture for several more minutes, at least long enough to cook off the alcohol if applicable, and reduce the sauce to some degree, skimming any fat that rises in the process. Pass this deglazing sauce through a sieve with or without a cheesecloth lining, and your fond is ready to use according to your gravy recipe. Use this link to our articles on the basics of making a brown turkey stock and how to use it along with this deglazing sauce to make a delectable pan gravy.
Related Products


Starting at
$72.99
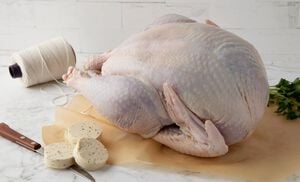
- White Broad-breasted hybrid breed
- Turkeys are humanely raised free-range with access to the outdoors
- 100% organic, non-GMO, all-vegetarian grain diet of corn and soy, and pure spring water without chlorine or fluoride
- No animal by-products in feed
- No antibiotics, growth hormones or arsenicals are ever used
- Giblets Included
- Raised on small-scale Midwestern farms in the USA – not factory farms
- Farm-to-table audit trail
- Farmers support sustainable agriculture and preserve the natural ecosystem
- Ships in an uncooked state
- Product of the USA
")
")
Starting at
$159.99
- 100% natural, farm-raised heritage turkey
- Slow-growing Narragansett and Bourbon Red breeds
- Grain feed of non-GMO corn and soy
- No antibiotics or hormones
- Free-range; turkeys forage outdoors and have the ability to fly
- Air chilled for best flavor and no retained water
- Hand processed
- Giblets included
- Ships in an uncooked state
- Product of USA
- Note: There may be small pinfeathers in the flesh, which are easily removed with needlenose pliers, tweezers, or your fingers


Starting at
$62.99
- White Broad-breasted hybrid breed
- 100% natural
- All-vegetarian and gluten-free grain diet of corn, soy beans
- No antibiotics, no growth hormones from birth
- Includes the ribs and a portion of the wing meat, as well as the back and neck skin
- Ships in an uncooked state
- Product of USA